AI Outfit Changer

AI Outfit Changer

See an outfit in your own photo before you wear it. Sign in with a free account, upload a person photo and a clothing reference, then choose your result.

Free account required · no card needed to tryUp to 3 watermarked previews per day

Your virtual fitting room

Change the look. Keep the person.

A free account is required for every generation, including Free Preview.

1 · Person image

A clear, front-facing photo works best.

2 · Outfit image

Flat-lay, on-model, or product images work well.

Up to 2 MB per image · JPG, PNG or WebP

Free Preview

Free · watermarked · up to 3/day

Essential Try-On

Watermark-free · 10 credits

Garment area: Upper body, Lower body, Full outfit

Loading…
Actual generated examples

From garment reference to try-on result

These examples use synthetic images of one fictional adult and actual model outputs. They are a small set of test cases, not a promise that every photo or garment will produce the same result.

Synthetic test person before changing clothes

Person

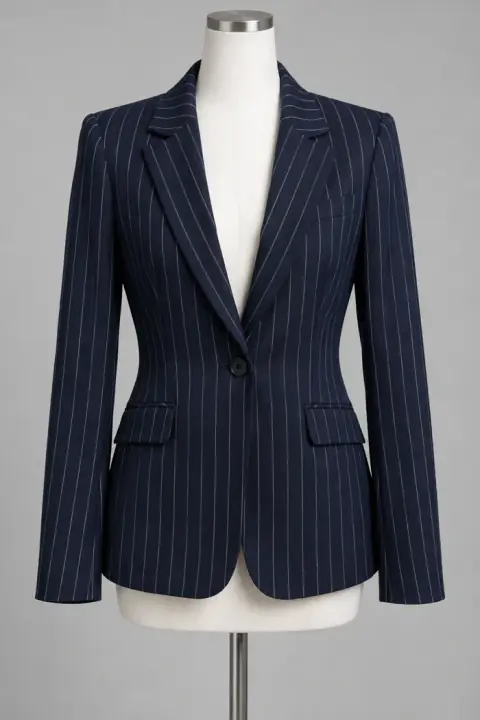
Pinstripe blazer garment reference

Garment

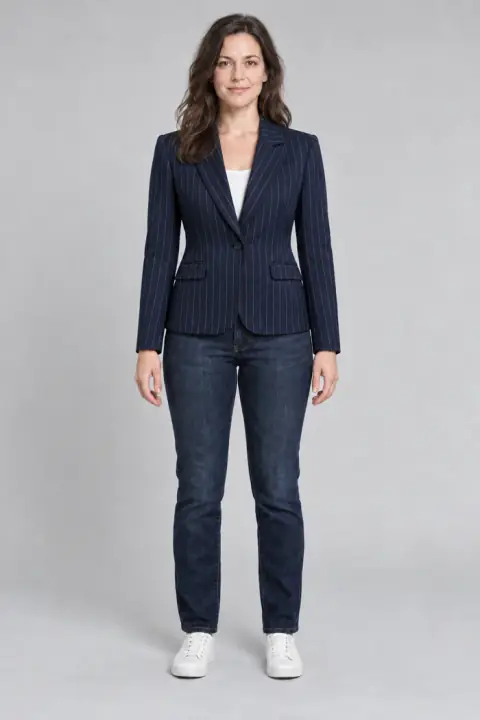
Pinstripe blazer actual Essential try-on result

Essential

Pinstripe blazer

The blazer shape and narrow stripe pattern remain visible, but the neckline differs from the flat garment reference.

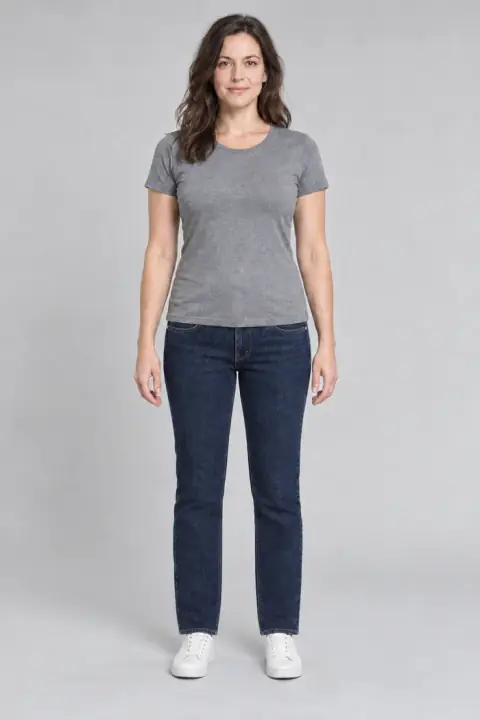
Synthetic test person before changing clothes

Person

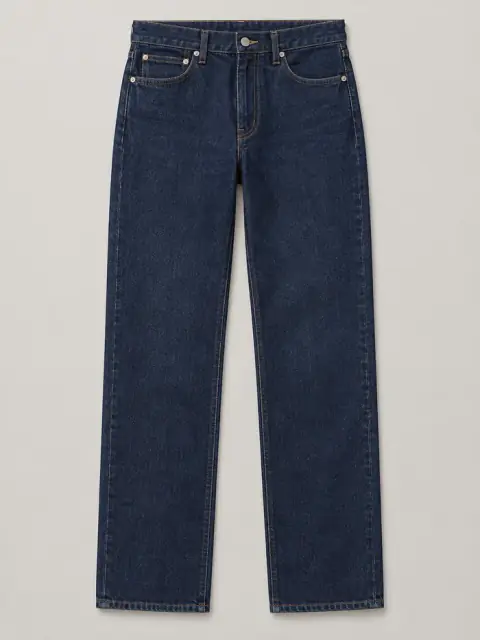
Indigo jeans garment reference

Garment

Indigo jeans actual Essential try-on result

Essential

Indigo jeans

The jeans change while the original top and shoes remain. Check seams and fit in the full image before using it.

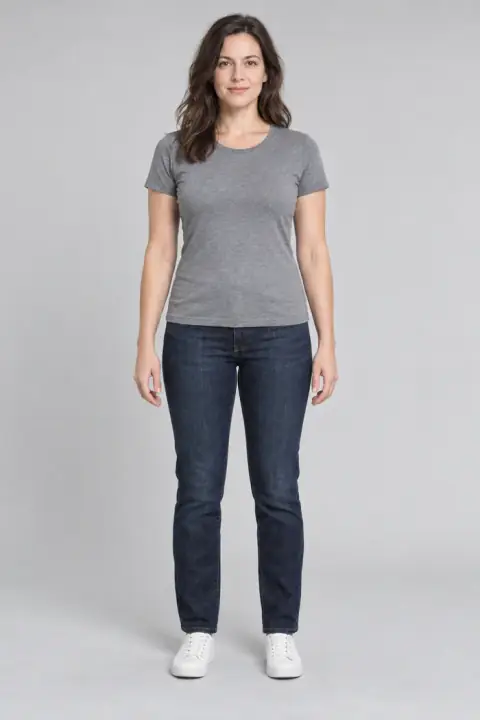
Synthetic test person before changing clothes

Person

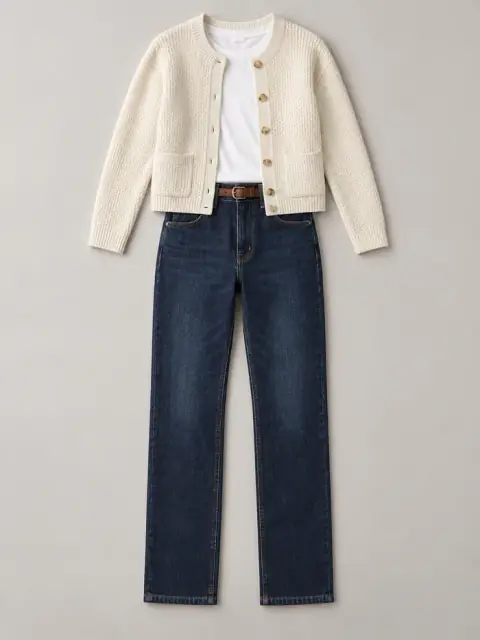
Cardigan outfit garment reference

Garment

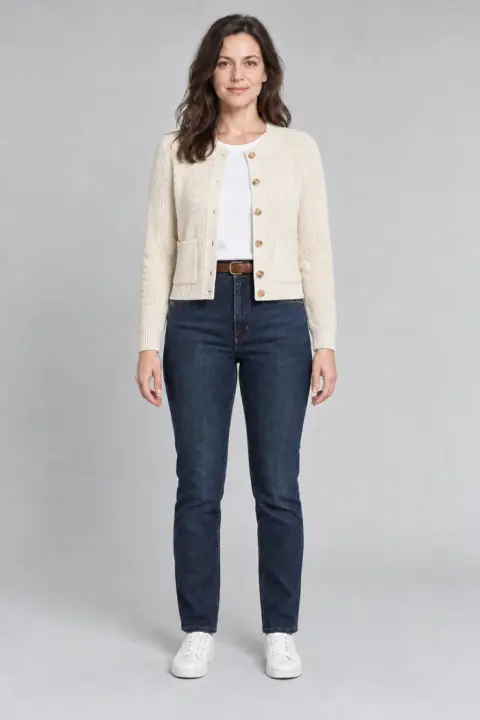
Cardigan outfit actual Essential try-on result

Essential

Cardigan outfit

The cardigan outfit appears on the person. This corrected test kept the white shoes and did not add a bag; earlier test runs changed an unrequested item.

Your first outfit change

A useful try-on starts with two clear photos

An AI outfit changer helps you explore how a clothing idea could look on a person in an existing photo. The reference image guides the garment, while the person photo supplies the starting pose and appearance. Treat the output as a visual experiment rather than a measurement of the real product. A clear input and a specific comparison usually teach you more than repeatedly generating unrelated looks.

How to change an outfit in three steps

  1. 1. Sign in and prepare your person photo

    Use a free account to access generation, including the free mode. Pick a single person whose clothing area is visible, with even lighting and enough space around the body. Avoid a crowded scene, a mirror covering the outfit, or a crop that cuts off the part you want to replace. Before uploading another person’s photo, make sure you have permission to use their image.

  2. 2. Add the garment and choose the area

    Upload a clothing reference showing the piece you want to explore. A product image, flat lay, mannequin photo or on-model reference can provide a starting point. Choose the garment area or full outfit available in the tool. For a useful comparison, keep the person photo and selected area consistent, then change one garment reference at a time. A simple background makes the clothing easier to distinguish.

  3. 3. Choose your result and inspect it

    Free Preview offers up to three watermarked previews per day, with the longest edge no greater than 512 pixels. Essential Try-On costs ten credits, requests 1K generation, produces a result without the preview watermark and supports styling notes. Eligible accounts can claim ten daily credits in the tool after signing in and completing the security check. Check the displayed balance, generate, then examine the result before downloading it.

Prepare images that give the AI a clear reference

Both uploads must be JPEG, PNG or WebP, and each file must be no larger than 2 MiB. If your phone saves HEIC images, convert them before uploading. Reduce the file size while keeping the garment outline readable. Enlarging a tiny or blurry source does not restore missing fabric detail.

For the person image, favour natural light, a straightforward pose and visible shoulders or legs as needed for your chosen clothing area. Hands, bags and hair can obscure the garment. For the clothing image, show the whole item where possible, including its neckline, hem and sleeves. Remove unnecessary surrounding content by cropping a copy of the photo, and keep the original for comparison.

Four ways to use a visual outfit comparison

Personal outfit planning

Compare a shirt, jacket or other clothing idea in the same person photo before deciding what to wear. Look at colour balance and the broad silhouette. Use the comparison to shortlist ideas, then check the actual garment measurements, materials and fit before buying.

Product presentation experiments

Explore a garment presentation before organising a shoot. Review the generated image against the physical item, especially colour, print and construction. A synthetic image should not be treated as proof of product accuracy. Commercial publication also depends on the applicable terms and your rights to every input.

Second-hand listing preparation

Try an outfit concept when planning how to present a resale item. Check labels, wear, dimensions and any visible defect using real product photos. Keep actual photographs available for buyers rather than using a generated look to imply the condition or fit of the item.

Social and creative moodboards

Explore different styling directions for a post or creative brief using photos you are entitled to upload. Save useful comparisons, then review faces, hands and garment edges at a larger size. Be clear about generated content where appropriate for the audience and platform.

What the result can and cannot tell you

AI may change a logo, lettering, a small pattern, the shade of a fabric or the outline around a body. It can also introduce extra folds or distort an obscured garment area. Inspect these details against both references. Trying a clearer image or a less obstructed pose may help, but no input guarantees a faithful copy.

A try-on image does not calculate physical fit, fabric feel, movement or the exact length of an item on your body. Processing time varies, and generation is not guaranteed to finish instantly. Your account uploads are not a public gallery; consult the privacy policy for handling and retention. A watermark-free result does not by itself grant permission to use a person’s likeness or a brand commercially.

Understand the free options before generating

The preview allowance and daily credits are separate. Claiming ten daily credits can fund one new Essential result when your account is eligible; it does not convert a saved preview into a higher-resolution image. Daily credits expire at the next UTC midnight and do not accumulate. Read the free guide for the claim flow, daily limits and the difference between the two modes.

See the free try-on guide

Capabilities

A better fit for every idea

Explore outfit ideas using your own references. Generated images are visual suggestions; inspect garment details before using a result.

Flat-lay to on-model

Use a flat product photo, a mannequin shot, or an on-model reference and see it on your own image.

Compare prints and colours

Use a clear clothing reference to guide the result. AI can alter lettering, logos and small patterns, so check them against the source.

Explore garment shapes

Compare silhouettes, lengths and styling ideas. Generated folds and textures may differ from the real garment and cannot prove fit.

Private by default

Your account uploads and saved generations are not published in a public gallery. Read the privacy policy for processing and storage details.

FAQ

Questions, answered.

A few things to know before your first virtual try-on.

Your next look is one upload away.

Try a fresh outfit on the person in your own photo before you buy, shoot, or post.